Evaluating objectives is a crucial step in managing and organizing Short Term Objectives (STOs) within the Office Puzzle system. This tutorial will guide you through the process of adding mastered dates for STOs by utilizing the “Evaluate Objectives” functionality. By following these steps, you’ll be able to efficiently set and manage key dates associated with your objectives.
- Step 1: Navigate to the client’s Dashboard.
- Step 2: Locate and click on the “Data” shortcut.
- Step 3: Within the Data section, find and click on the “Datasheets” option.
- Step 4: On the Datasheets page, look for the prominently displayed “Bulk Actions” button. Click on this button to access a dropdown list containing several options for managing your objectives.
- Step 5: From the dropdown list, choose the “Evaluate Objectives” option.
- Step 6: Upon selecting Evaluate Objectives, a table will display various categories and items related to your objectives. This table includes information about the objectives, along with the proposed mastered dates.
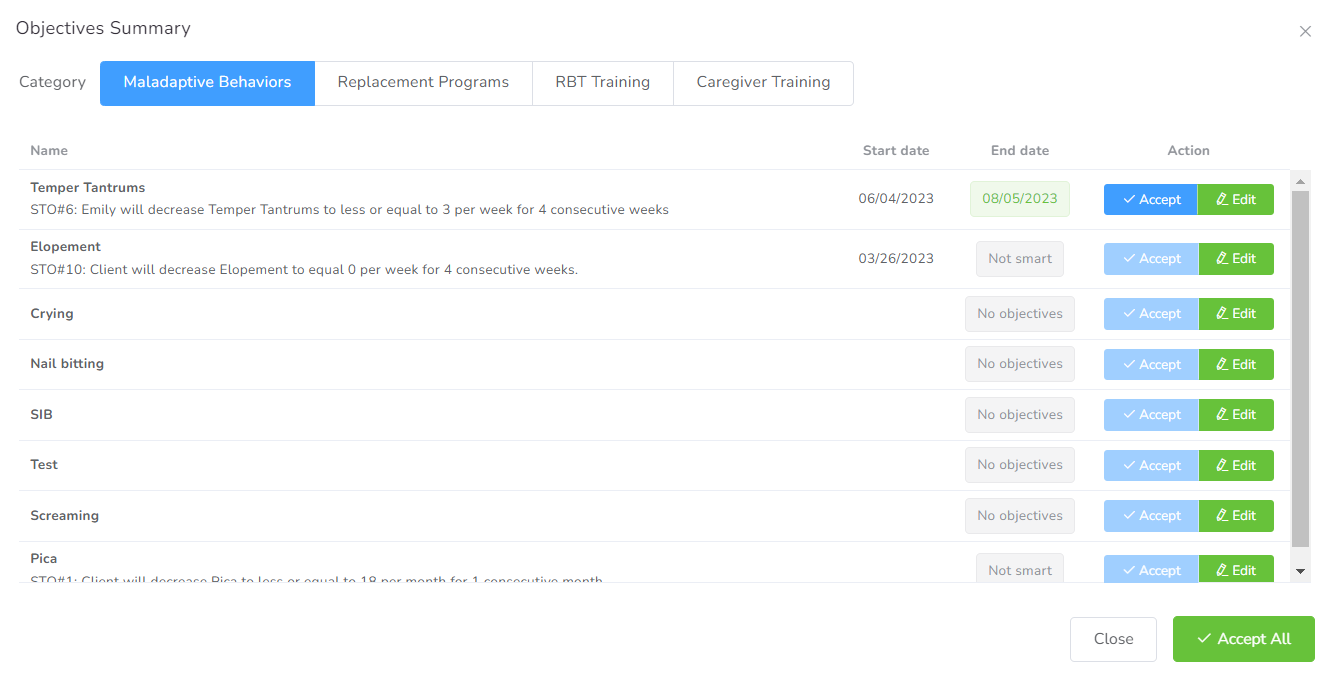 Step 7: In the table, you will see the option to either “Accept” the suggested mastered date or “Edit” it as needed. Evaluate each objective and decide the appropriate action based on your requirements.
By following these steps, you can efficiently evaluate objectives and manage mastered dates for STOs in the Office Puzzle system. This functionality streamlines the process of setting key dates, ensuring that your objectives align with your client’s progress. Make use of the Evaluate Objectives feature to enhance your workflow and keep your Objectives on track.